Based on What i start process and write down the point in A4 paper.
.JPG)


What
does mean analog?
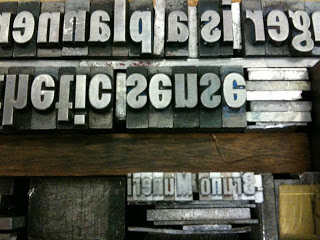
Analog is the
opposite of digital defined doing on manual by handmade. Any technology, such
as design clothes, that doesn't have digital to print out, for example do it in
using the analog silk screen in the printed image to paper. Another definition of analog is something
that is similar to that of another, the two are
said to be analogous. Analog copies substantiate in different ways from and are
often inferior to the original. Besides that, the easily identified original is
privilege above a copy. the Original identity may be consist of elements that
cannot be perfectly reproduced, for example, the original brush painting, the
three dimensional quality of the paint on the canvas, the smell of paint, and
the texture experience of paint in the canvas. Analog copies have an identity
that derives from but need to separate from the original. Even digital can
copying technology can produce only for reproduction, not a replication, of
such an analog creation.
What
does mean digital?
Digital is the
development programming of the future because it gives us an accurate way to
represented data and a simple way to mechanically store and manipulate of data.
For this digital world is inevitable, so we hope this explanation will help
everyone to understand to the digital concept. For example like direct printing
by plate imaging system or printing the process in computerized control ink jet
printers.
What
the definition of Analog printing?
Analog printing mean refers
to the printing process in which manually prepared screen or plates are used
for printing any type of material. Textiles printings are analog printing uses
master in the form of screens, block printing, roller printing, and so on.
All stages involved in analog printing are given as follows
1.
To print any material first step is
to create files for each and every color used in printing and a then to
separate those files with respect to their colors.
2.
The second step is to create screen
for every file with respect to their colors. It means every color needs a
separate screen. These screens are produced by heating process.
3.
Third step is to dry the screens
4.
Fourth step is about printing. But
here again one has to print each colored file separate from rest and after one
and other, all colors will be printed.
5.
Dry the colors
6.
Finally keep the screens safe for
next time usage.
FOR EXAMPLE:
Analog Typography/
type printing.


Letterpress printing


Analog Stamping type
and pattern.


Analog art
printing.


Analog photography


Analog motion
graphic

What
does mean analog screen printing (Silk screen printing)?
Silk screen
printing is kind of ancient art can be traced back to thousands of years to
origins of Japanese fabric dying. In the 1960, Andy Warhol begin to use it to
generate iconic images, such as Campbell soup cans and his portrait of Elvis
Presley and Marilyn Monoroe, and in doing so brought the practice of art the world's
attention. Over the year, already developed into a very popular used in the
production of high-quality art print, the artist is able to retain control over
the entire printing process, the end result.
Screen printing
also as know as called serigraphy is a method of creating as image on paper,
wood, glass and metal, fabric to print an image like some t-shirt, logo and so
on. The techniques are used both for making fine art prints and commercial
applications such as printing a company’s logo on the t-shirts.
For example:

Here are the
steps to printing onto paper for one or multi-color designs:
1. Attache a pair of hinge clamps to your work surface. Make
certain they are square and straight when you screw them in.

2. Place your printing screen in the hinge
clamps.
3. Tape two pieces of cardboard box to the underside corners of your printing screen nearest you.
3. Tape two pieces of cardboard box to the underside corners of your printing screen nearest you.

4. Lightly spray your print surface with photo
adhesive or spread a tiny amount of table adhesive over the area so that it is
slightly tacky.
5. Take a large piece of transparent paper and place it over
your work surface; taping it on one side only to your print table.

6. Print one pass of your image onto the
transparent paper.

7. Place your paper under the transparency so that your image
will print where you want it to.

8. Flip the transparency away from your print area.
9. Mark the bottom and side of the paper edge with masking tape.
These will be your registration marks- don’t remove them.

10. Pour a bead of ink along the bottom of your screen area
(the well).

11. Flood the screen with the screen in a
raised position then print with the screen down.
12. Print all
pieces of paper with this screen and let them dry.

13. Flip your transparency paper back onto your print
surface. And print the second color screen. Use that new print as a guide and
place one of the printed pieces of paper so the colors line up with the acetate
print. Then place new registration tabs for this piece of paper.

14. Repeat these steps for each color you have in your
design.
What
the definition of Analog Digital?
Analog digital is
refers to printing process in which computerized control ink jet to the
printers and laser printers are used for the printing of any type on material.
If using computer is linked to printing machine (Ink jet printer) Conversion of electronic design data in the form of analog image with the help
of a lots or pixels and no need of design screens, block or design rollers.
Also known as printing without screens or plate less printing.
A digital screen
printing has brought new change in the printing world and also has a benefit of
this printing work. The printing can be high in rates and you will find that
the quality of the print is far much better than ordinary printers. For example
many t-shirt companies are giving the order to digital printing companies to
making a digital print on the shirt so they can introduce their shirt in the
market as a new fashion and also can attract more customers towards their
garment product.
Digital screen
product is the one fastest and innovative ways of creating a printed material.
it can helpful in printing logo, image, t-shirt designs, cloth designs and so
on. It is convenience and efficiency. The digital screen printing is very
important to process. Most of the business establishments, especially in the field
of advertising, name card, magazine, packaging need to have digital printing
tools with them. That is the one must know how the different of digital
printing processes as well as concepts. The digital screen printing uses
specific type of ink and using the toner to produce great quality images. The
price of the toner is highly competitive in the market.
Digital
printing process image


For Example:
Poster printing
design


Advertising printing design


Name
card / greeting card printing


Magazine
printing design


Packaging
printing design


Bag
printing design


Shirt
printing design


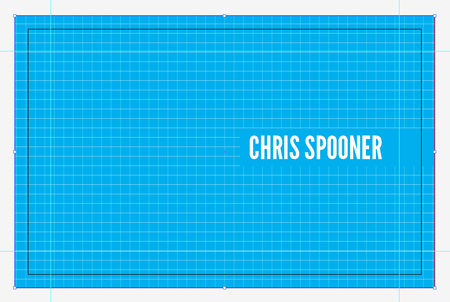
How to Design a Print Ready Business Card
Design in illustrator
Step 1:
Setting up your document

First step need to create
a new document in Illustrator. The business cards should be 88x55mm, but the
size may be can be vary across different print firms and enter the dimensions
to the width and height options and the bleed amount below. Cards being double sided
change the number of art boards option to 2. And then check your color mode is
set to CMYK.
Step 2:

Drag out guides and
align them with the black outline of the cards (Press CMD+R to toggle rulers
on). Select the bottom horizontal guide and the two left vertical guides and
then hit enter to open the move window. Enter the 5mm in the horizontal and
vertical fields then click OK.
Step 3:

Select the
remaining guide and then open up the move window once again, for these times
enter -5mm in the fields. Now right click the document and select the lock
guides. These guides are in place to identify a 5mm safe margin around the edge
of the business card.
Step 4:

Use the line tool
to draw a short line with a 10% black stroke. Copy (CMD+C) and Paste in Front
(CMD+F), then rotate it by 90degrees. Drag a selection across both objects and
drag them into the Swatches palette. Delete the two original lines left on the art
board.
Step 5:

Draw a white rectangle
across the first card, covering the whole template within the red bleed line.
Copy and paste this rectangle, then fill the duplicate with the previously
created pattern swatch. As the swatch repeats it will create a seamless grid
pattern.
Step 6:

Paste the line work
character into the business card document and change the stroke colors to 100%
Cyan. Don’t forget to tweak the fill and stroke used to create the pupils of
the eyes.
Step 7:

Move the character
into place so it sits on the left side within the red bleed line. The
illustration may extend beyond the margin guides, but keep the head within the
black outline as this is the final card size once cropped.
Step 8:

Draw a cyan filled
rectangle on the right side of the card. Run the right edge all the way to the
bleed outline, and line the overall dimensions up with the background grid
pattern. Use the Type Tool to enter your name in an impactful font. Here I’m
using the fantastic League
Gothic in white to reverse out of the cyan rectangle.
Step 9:

Continue adding
textual elements to the design, but at a smaller type size and set in Cyan. I’m
using some general profile links, but you might want to add the usual contact
details often found on business cards.
Step 10:

Select all the
elements used in the front side of the card and drag them over to the rear
while holding the ALT key. Align everything up to the outer bleed line then
delete the character, the background grid and contact details.
Step 11:
Change the white
background rectangle to Cyan, and then create another grid swatch but this time
use 30% Cyan as the stroke color. Drag this swatch into the Swatches palette
and add it to a duplicate background rectangle.
Step 12:

Stretch the rectangle
behind your name to fill the full width of the card and change the fill color
to white. Drag out one extra guide to identify the centre of the card, and then
use this guide to align up the text centrally. Switch the text color over to
Cyan then change the wording to a welcoming message.
Step 13:


The design of the card
is pretty much complete. We have the subtle grid background providing a base to
the design, the hand-drawn character and the all important contact details. On
the rear the color scheme is reversed, and the centre rectangle continued to
house a nice, fun message.
Step 14:

Press CMD+A to select
all, then use the shortcut CMD+Shift+O to convert all fonts to outlines, this
will help prevent any font related problems with the printer. Go to File >
Save As and select Adobe PDF in the drop down menu. In the PDF options, select
the appropriate printer’s marks in the Marks and Bleeds section. Trim and
Registration marks are often the most important, with Color Bars and Page
Information sometimes being left to be added by the printers themselves.
Step 15:


Open up the final
print file in Adobe Acrobat to check over the design. The two art boards from
Adobe Illustrator have been used to generate two pages in the PDF document,
leaving just this one file to email over to your printer of choice.
Comparison
of analog silkscreen and digital printing.
Analog silkscreen
Analog silkscreen different because it relies on silk screen to take the design. And then the design is the incorporated into t-shirt printing using a layering technique.
Analog
Printing Features
-Colors are laid down one at a time
-Separate silk screens for each color used
-Maximum print size is 32-inches by 45-inches
-Separate silk screens for each color used
-Maximum print size is 32-inches by 45-inches
- Lower cost for high volume jobs.
- Lays down thick, rich colors on reverse backgrounds.
Advantages
of Analog Printing
- need time and skill for design registration.
- sample may be different than bulk
-Ink is mixed for each job and allows
custom color matching
-Analog inks are more opaque than digital
-Inks are more affordable
-Analog excels at printing reverse colors
-Analog inks are more opaque than digital
-Inks are more affordable
-Analog excels at printing reverse colors
-Half tones not easy
Digital printing
Digital printing rely on four-process system that CMYK (cyan, magenta, black, yellow). This basis of digit printing. The digital system take an art file and reproduce it directly by sending it to the press.
The
Features of Digital Printing
-Four-color processing system to
create designs: Cyan, Magenta, Yellow and Black
-Does not require screens or plates
-The maximum print size on digital jobs is 120 inches.
-Does not require screens or plates
-The maximum print size on digital jobs is 120 inches.
Advantages of Digital
Printing
-Prints all colors in a single pass and
makes the process more efficient
-Since the process is digital, there is a perfect registration between individual colors
-No bleeds or traps occur because digital printers use butt registration
-Capable of reproducing any type of graphic
-Since the process is digital, there is a perfect registration between individual colors
-No bleeds or traps occur because digital printers use butt registration
-Capable of reproducing any type of graphic
-Half-tones no problem.
-Reduces prep time for efficient project completion
-Reduces prep time for efficient project completion